| NetRegister strongly
recommends the use of Outlook Express as your e-mail client.
Outlook Express has many configuration options, supports enhanced HTML easily
and is quite simple to setup. Outlook Express is available for free through Microsoft™
Corporation, but the e-mail application comes bundled with Internet Explorer,
so you will need to download the entire IE® and all of its applications in
order to use Outlook Express. More information about Outlook Express can be found
at the official website
for Outlook Express by Microsoft Corporation.
Feel free to use any
e-mail client application other than ones for which we provide direct support.
You can send and retrieve your e-mail using Netscape Mail, Pegasus, Eudora Pro,
and any other e-mail client applications. Outlook
Express Setup
Step - 1 -
Make sure you have first downloaded
and installed Outlook Express before proceeding. You can only download Outlook
Express as a bundled application with Internet Explorer.
Once you have
downloaded and installed Outlook Express, open the application. Once the application
is open and running, go to "Tools", then select
"Accounts" from the pull-down menu. You should
now see a pop-up window labeled "Internet Accounts".
From the pop-up window, select "Add",
then "Mail" from the top left side of the
window.
Step - 2 -
You should now see a pop-up window on
your screen labeled "Internet Connection Wizard".
This screen will be asking for your name or your organization's name. This name
will show up on all mail sent from the e-mail address you are setting-up. Fill
out the requested information.
Below is an example of what you should
see if you use your name.
Step - 3 - The next pop-up window
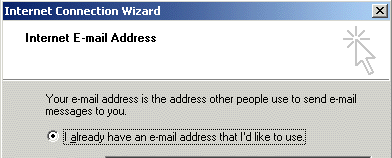
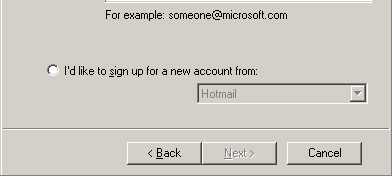
will ask for your Internet E-mail Address. This is the e-mail address you
are setting-up through Outlook Express. We have automatically generated the screen
capture below to reflect what you should enter if you are setting up your POP3
account. If this is not the case, enter any other POP3 account you have already
setup.
Below is an example of what you should see if you use your master
POP3 account.

| 
| info@your_domain_name.com |

|

|
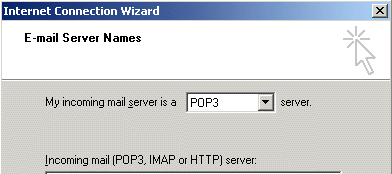
Step - 4 - The next screen will
ask for your E-mail Server Names. Simply follow the screen below and fill-in
the fields exactly as shown below. Make sure POP3 is selected for your incoming
mail server.

| 
| mail.your_domain_name.com |

|

| 
| smtp.your-internet-service-provider.com |

|

|
Step - 5 - The Internet Mail
Logon screen will ask for your login for the POP3 account (for example info@your_domain_name.com).
After you enter this information, be sure to enter yourpassword. If you wish,
Outlook Express will save your password so you don't have to enter it each time.
Make sure the "Remember Password" box is checked if you wish to store your
password. Do NOT check "Log on using Secure Password Authentication
(SPA)".
Below is an example of what you should see if you use
your master POP3 account.
Step - 6 - You have just completed
setting up this account in Outlook Express, and should see the screen shot below!
Be sure to click on the "Finish" button on
the bottom.
Step - 7 - Now that you have added
a POP3 account to Outlook Express, you can begin using your e-mail service! If
you desire, you can add multiple POP3 accounts to Outlook Express, following the
same steps as you did for this first POP3 account.
In the event that
you use multiple POP3 accounts, be sure that you indicate which of your accounts
that you wish to be your default account. Your default account is the one that
will be used to send e-mail, unless you specify otherwise when composing an e-mail. | 
